アプリケーション開発
ここでは、Google Mapを表示するアプリケーションを作成します。
Eclipseを起動し、「ファイル(F)」タブから「新規(N)」-「Androidプロジェクト」を選択します (表示されていない場合はその他(O)からAndroidプロジェクトを選択)。
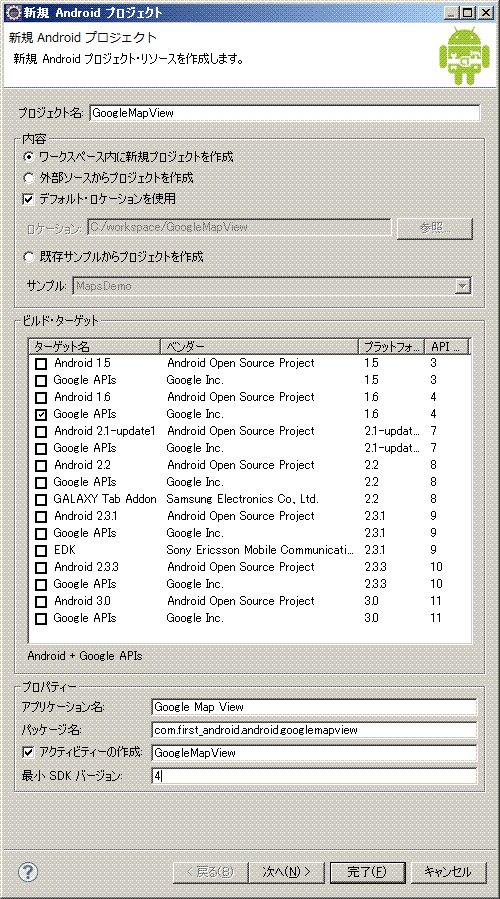
今回はGoogleMapViewというプロジェクトを作成します。 Android Maps APIはAPI Levelが4なのでGoogle APIs 1.6以上を指定する必要があります。 最小SDKバージョンを4を指定します。 プロパティーの各項目についてはプロジェクトの作成方法を参照してください。
プロジェクトが作成されたら、AndroidManifest.xmlを編集します。 以下は修正後のAndroidManifest.xmlです。赤字で表示されている個所が今回追加した部分です。
<?xml version="1.0" encoding="utf-8"?>
<manifest xmlns:android="http://schemas.android.com/apk/res/android"
      package="com.first_android.android.googlemapview"
      android:versionCode="1"
      android:versionName="1.0">
    <uses-sdk android:minSdkVersion="4" />
    <uses-permission android:name="android.permission.INTERNET"></uses-permission>

    <application android:icon="@drawable/icon" android:label="@string/app_name">
        <activity android:name=".GoogleMapView"
                  android:label="@string/app_name">
            <intent-filter>
                <action android:name="android.intent.action.MAIN" />
                <category android:name="android.intent.category.LAUNCHER" />
            </intent-filter>
        </activity>
        <uses-library android:name="com.google.android.maps"></uses-library>

    </application>
</manifest>
追加した2か所についてそれぞれ説明します。
<uses-permission android:name="android.permission.INTERNET"></uses-permission>
このタグではインターネットにアクセスするための設定を追加しています。
<uses-library android:name="com.google.android.maps"></uses-library>
このタグではAndroid Maps APIを利用するためのライブラリ情報を追加しています。
先ほど取得したAndroid Maps API KeyのXMLタグを main.xmlに追加します(赤字で表示されている部分)。 main.xmlはプロジェクトの[res]-[layout]下にあります。 デフォルトではTextViewタグがありますが今回は不要なので削除しています。
<?xml version="1.0" encoding="utf-8"?>
<LinearLayout xmlns:android="http://schemas.android.com/apk/res/android"
    android:orientation="vertical"
    android:layout_width="fill_parent"
    android:layout_height="fill_parent"
    >

<com.google.android.maps.MapView
    android:layout_width="fill_parent"
    android:layout_height="fill_parent"
    android:apiKey="XXXXXXXXXXXXXXXXXXXXXXXXXXXX"
    />
</LinearLayout>
[src]にあるGoogleMapVies.javaを修正します。 デフォルトではActivityクラスを継承していますが 今回はGoogle Mapを表示するためMapActivityクラスを継承させています。 MapActivityクラスにはisRouteDisplayed()という抽象メソッドが用意されており、 継承したクラスではそれを実装する必要があります。 isRouteDisplayed()メソッドはルート情報表示するかどうかの情報を返します。 今回は不要なので無条件でfalseを返しています。
package com.first_android.android.googlemapview;

import com.google.android.maps.MapActivity;
import android.os.Bundle;

public class GoogleMapView extends MapActivity {

    /** Called when the activity is first created. */
    @Override
    public void onCreate(Bundle savedInstanceState) {
        super.onCreate(savedInstanceState);
        setContentView(R.layout.main);
    }

    protected boolean isRouteDisplayed(){
    	return false;
    }

}
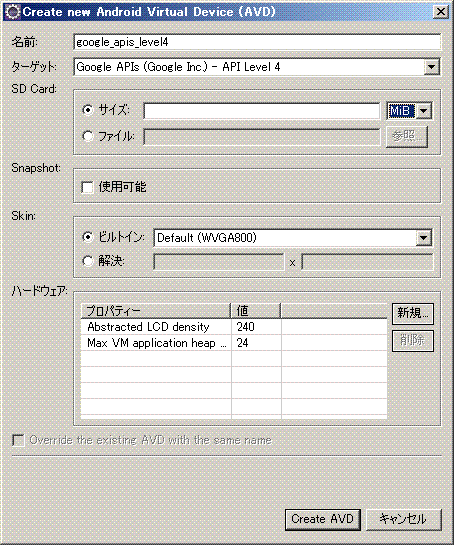
プロジェクトを作成したときに、ビルドターゲットとしてGoogle APIs 1.6を指定したので それをターゲットとしたAVDを作成する必要があります。 AVDの設定方法はこちらを参照してください。
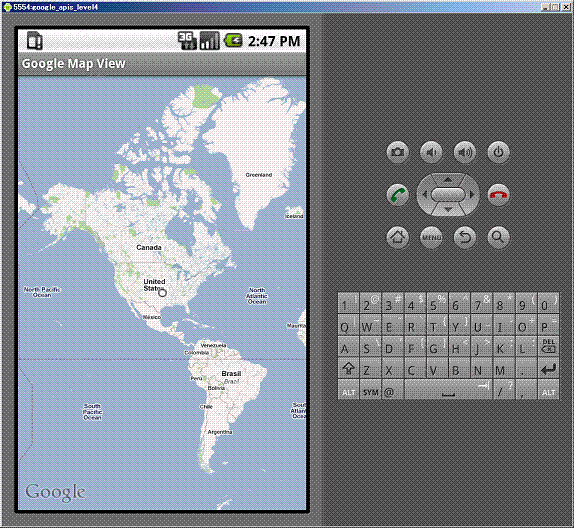
[実行]ボタンから[Androidアプリケーション]を選択して実行します。 しばらくするとエミュレータが起動します。 Menuボタンを押してLockを解除すると。 アメリカを中心とした地図が表示されます。 地図を表示しているだけで、地図に対して操作を行うことはできません。